Mix the (A) white and (B) blue impression putty with your hands until you have a uniform color. The impression putty takes about 1 minute to mix. You will have roughly 6 minutes before the impression putty begins to harden.
IMPORTANT: If you see strands of white, continue mixing. The impression putty needs to be mixed thoroughly before it can harden.
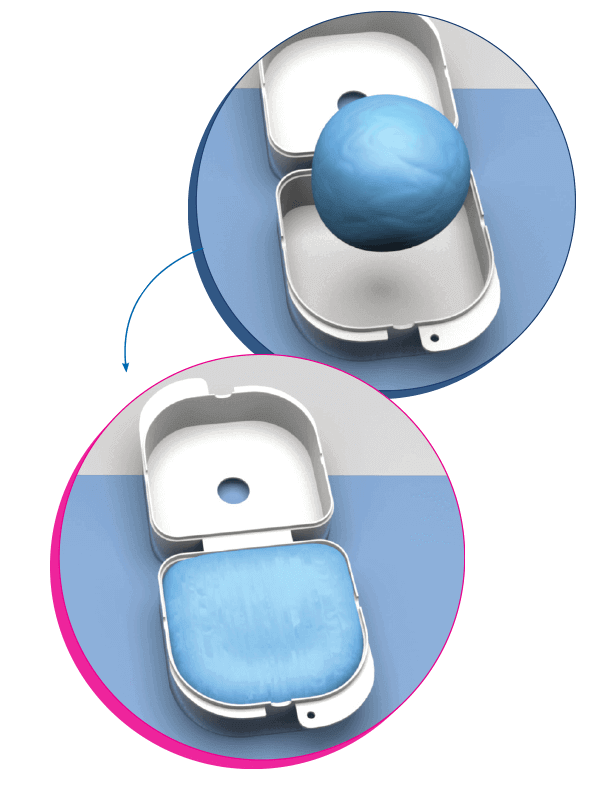
The impression putty must be uniformly colored blue. See correctly mixed impression putty here.
Now separate the mixed impression putty into two pieces; one about one quarter of the original size, then set both pieces on the non-stick paper.

Place the larger piece of mixed blue impression putty inside the bottom of the denture former; the top of the denture former is noted by the quarter sized hole. Quickly spread the soft blue impression putty out evenly, so it reaches the sides of the denture former.
IMPORTANT: Make sure the mixed impression putty reaches the top edges of the denture former.
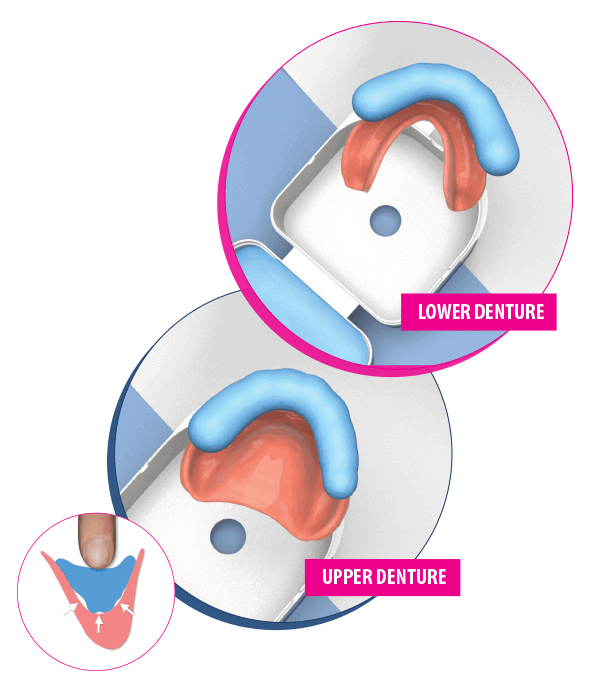
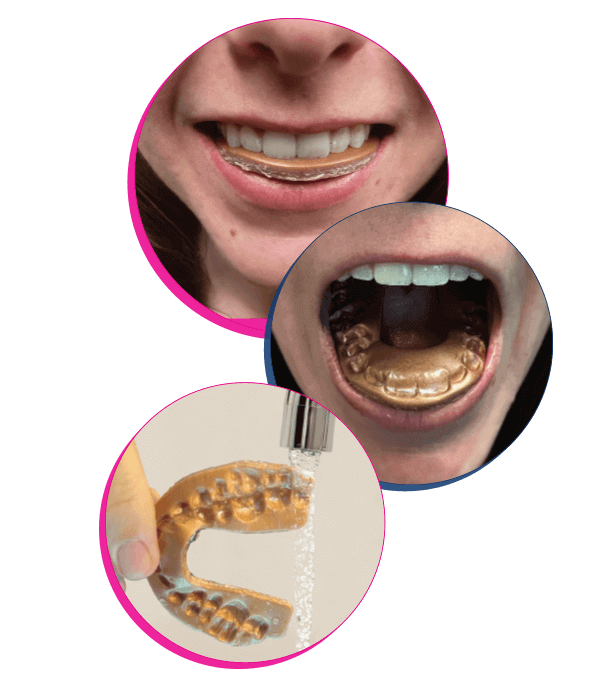
Take the remaining smaller piece of impression putty and press it down into the groove or “U” shaped area of your denture. Begin pressing it into this area starting at the back of your denture and pressing it deep all the way around using your finger. You must work quickly. You have 6 minutes to complete all your tasks once your refrigerated impression putty is mixed.
IMPORTANT: Use your finger when pressing it down. The final outcome of your denture and how it fits in your mouth will depend on your ability to fill all the voids with impression putty.
IMPORTANT: You must not allow any voids in the impression of your denture.
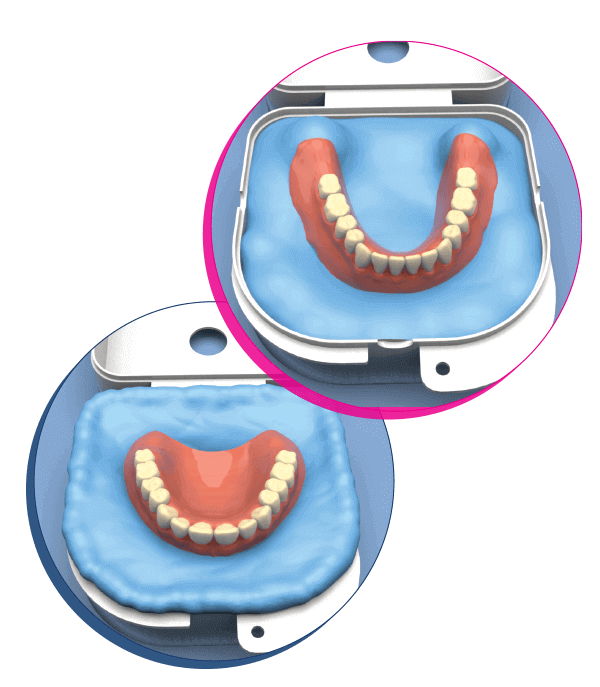
Turn your denture over and place it in the mixed impression putty which is in the bottom of the denture former.
IMPORTANT: Place your denture with the teeth facing up and forward. Gently, press your denture down into the base.
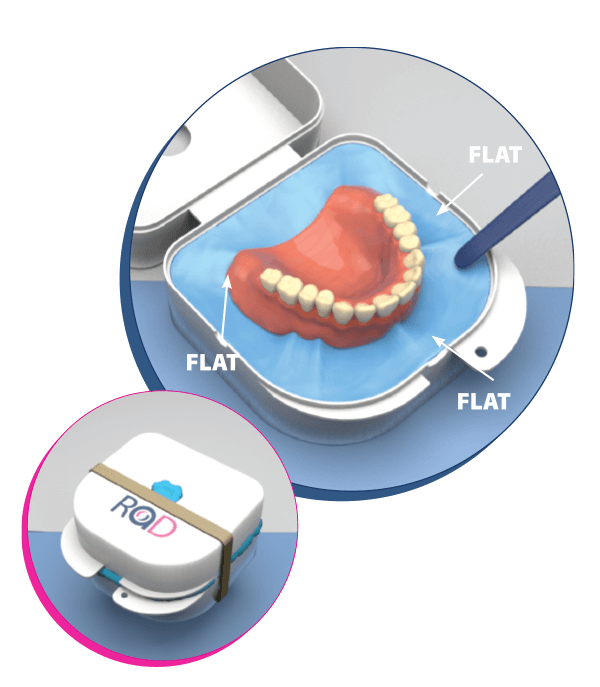
IMPORTANT: Gently push down your denture until the impression putty has covered the edges of your denture, as shown here. This may cause putty to spill over the denture former. In that event, remove this excess putty.
Use your finger to go around the outside of your denture and press the mixed impression putty flat to the edges of the denture former. If necessary, remove excess putty from denture former. Keep the blue putty away from the teeth
and only up to the pink, or to the edge of the denture.
IMPORTANT: While the impression putty is still soft, close the denture former to clear any obstruction of impression putty away from the edges and place a rubber band around the denture former.
Wait approximately 10 minutes for the impression putty to harden then proceed to Step 5.
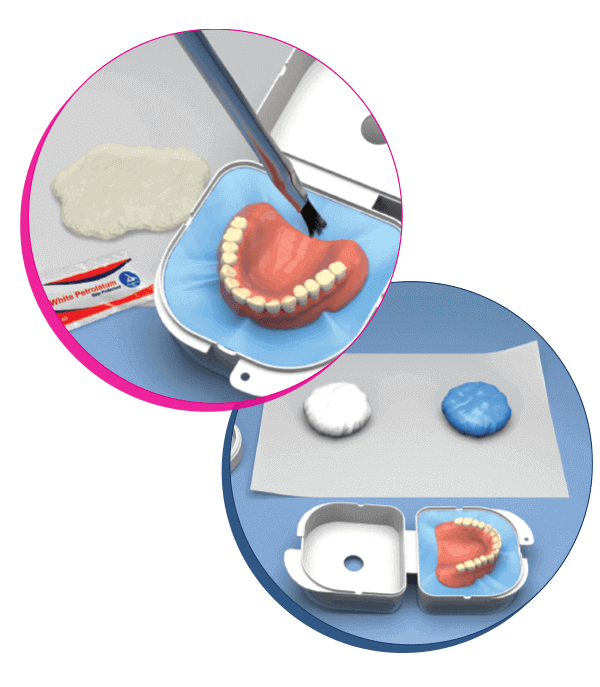
Open the denture former and the small packet of white separating paste. Squeeze the separating paste onto the non-stick paper. Using the brush, paint a thin layer of the separating paste over the hardened blue impression putty.
IMPORTANT: Clean your hands if you get separating paste on them. Do not apply the separating paste to any part of the denture.
Remove from your refrigerator one jar marked (A) and one jar marked (B). Open the jars and layout the white and blue impression putty from the containers. You will now prepare the impression putty the same way you did in STEP 1.
Mix the (A) white and (B) blue impression putty with your hands until you have a uniform color. The impression putty takes about 1 minute to mix. You will have roughly 6 minutes before the impression putty begins to harden.
IMPORTANT: If you see strands of white, continue mixing. The impression putty needs to be mixed thoroughly before it can harden.
The impression putty needs to be uniformly colored blue. See correctly mixed putty here. Now separate the mixed impression putty into two pieces; one about one quarter of the original size, then set both pieces on the non-stick paper.
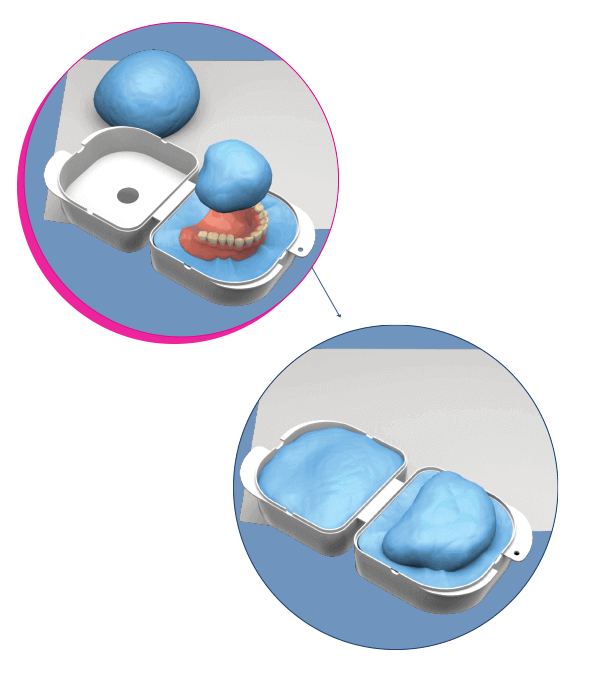
Take the smaller piece of mixed impression putty, shape it into a ball and then slightly flatten it. Place it over all the teeth and cover the rest of your denture. Be careful not to trap air as you form the impression putty over the denture.
Work quickly.
Press the larger piece of newly mixed blue impression putty into the top of the uncovered denture former, quickly spreading it evenly so it reaches the upper edges of the denture former.
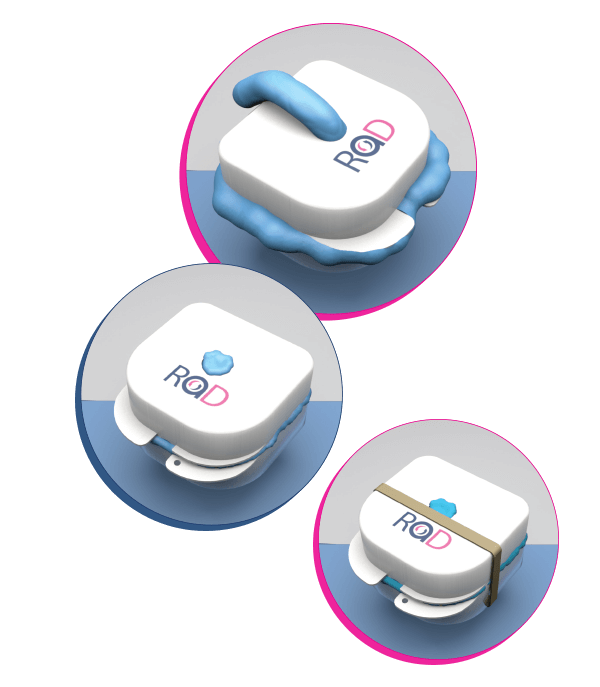
Now slowly close the clamshell denture former together allowing the excess impression putty to squeeze out of the vent holes and sides of the former. Hold it shut with a rubber band and remove all of the excess impression putty before it hardens.
Do not reopen for a minimum of 10 minutes or until fully hardened.
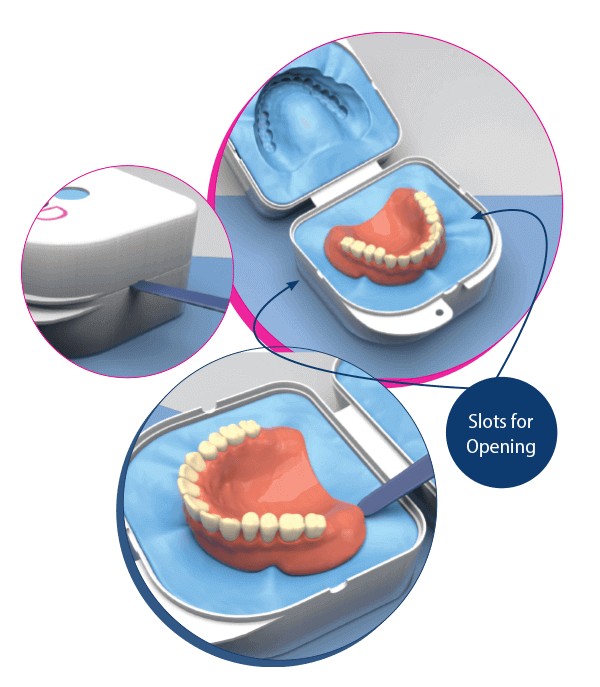
Now that the impression putty is fully set, please remove your denture. Begin by removing the elastic band and opening the denture former.
IMPORTANT: You will see one small slot on the front of the denture former and on each side. Gently place the utility knife into each hole and twist. This will begin to open your denture former. Gently pull apart the top and bottom of the denture former.
And there’s your denture and the impression of your denture.
Using your utility knife, gently remove your denture from the impression. This is easily done from the back of the denture
as seen here.
Close the denture former and replace the elastic band.
If you ordered a full set of dentures (upper and lower) follow the instructions, 1 through 11 for the denture you have not completed.
In addition to your impressions, we need to also know how your teeth fit together, so please capture two bite registrations with the enclosed wax wafers. You must have your denture and any opposing denture or partial denture (bridge) in your mouth to capture a proper registration. First, fill a cup with warm clean tap water and place the wax wafers into the water for approximately one minute.
Selecting your denture colors
When choosing your colors keep in mind the colors may vary slightly from the color guide due to the manufacturing process.
Check the box next to the desired color you want for both your teeth and your gums and then sign the color guide as shown here.
WE CANNOT MANUFACTURE YOUR DENTURES UNLESS THE COLOR GUIDE IS SIGNED.